Showing posts with label recipes. Show all posts

Tuesday, March 10, 2015

What's Inspiring You?

See that light shining through the cheesecloth in the back of this shot?  That's honest-to-goodness sunlight!  Yes!  Daylight savings did not disappoint.  I was able to set up and take many, many still life shots all Sunday afternoon while the sun poured in through this upstairs southwest window. This particular photo is for a backlit assignment in Kim Klassen's Be Still--52 class.

I want thank the many folks who tried my lemon cookie recipe over the weekend!  I received loads of notes on Facebook and Instagram, comments here on the blog, and emails and texts about the cookies.  I'm so glad that you all love them as much as I do!  They are about as easy to make as cookies get, and the taste payoff is extraordinary.  I even saw photos of some other people's cookies, and they were gorgeous!  Nothing like bonding over baked goods.  It truly takes a village to bake a biscuit.

I'll have more recipes very soon.  In the meantime, I wanted to share a few inspiring links:

~Click--A print and digital magazine by photographers for photographers.  These women make a seriously gorgeous product.  Plus, they're running a fun photography contest from now until April 15.  Get clicking!

~Sarah Raven--This is a link to her YouTube channel.  I learn so much from her gardening videos.  Champion of heirloom varieties, she is a gardening goddess . . . and a brilliant teacher.  Plus, just getting to peek at the grounds of her farm makes me want to try new ideas in my own little piece of earth.  

~Thomas McGuane--This link will lead you to an NPR interview with Montana writer Tom McGuane.  Mr. Magpie heard the interview yesterday, told me about it over a quick lunch at Becky's Diner today, and I've just been listening to it and reading the transcript tonight.  It's definitely a worthwhile listen, especially for fellow readers and writers.  "I think there's only one interesting story," says McGuane, ". . . and that's struggle."  I have to say, after years of writing and teaching writing, I agree.

If you have a moment, let me know what's inspiring you this week.  I'd love to hear what you're up to.  

Wednesday, March 4, 2015

Lemon Sunshine Cookies


Do you remember when I said that "sunshine in a bowl" was going to be the theme for me until the snow melts?  I wasn't kidding.  In fact, I've expanded my theme to include sunshine in a glass, sunshine on a plate, and sunshine in a jar.  As long as that sunshine ends up in my belly, I'm happy.

These butter cookies definitely fit the theme, plus they are a breeze to make with ingredients many folks are likely to have on hand.  Make them when you're craving shortbread with a little twist.  Mr. Magpie and I have been dipping them in our tea and coffee all week.

Lemon Sunshine Cookies

Yield: Approximately 30 cookies

INGREDIENTS
  • 1 cup (2 sticks) unsalted butter, room temperature
  • 2/3 cup granulated sugar
  • 1 large egg
  • Grated zest of one lemon
  • 1 tablespoon + 1 teaspoon fresh lemon juice
  • 2 1/2 cups unbleached, all-purpose flour
  • Powdered sugar for dusting
METHOD
  1. Preheat oven to 350 degrees F.
  2. In a large bowl with an electric mixer or in a stand mixer, cream butter and sugar until fluffy.
  3. Beat in the egg.
  4. Add lemon zest and lemon juice.
  5. Gradually mix in the flour until well incorporated.
  6. Roll dough into one-inch balls and place on a parchment-lined baking sheet.
  7. Using the back of a fork, mark the cookies in a crosshatch pattern.
  8. Bake for fifteen minutes (I turn them once midway through the baking time) until the bottoms are just beginning to turn golden brown.
  9. Transfer to a cooling rack and dust with powdered sugar (I use a small sieve to do this).
  10. Optional: I love really lemony cookies, so I sometimes sprinkle a little more lemon juice over the top before step 11.
  11. Allow to cool, then, if you like, dust with powdered sugar one more time.
  12. Store in a cookie tin or other airtight container.
These really couldn't be faster to make, and you can freeze them as well, so you'll always have some around for tea time!

P.S. I wouldn't be opposed to dipping one half of each cookie in dark chocolate.  Just sayin'. 


Tuesday, February 24, 2015

Think Spring


Wherever you are, I hope you are warm and that soothing rays of sunlight are shining down upon you. Our reality here in Maine right now is the picture above.  And more snow is headed our way tonight.  

I say, screw reality.  

I'm about ready for mojitos, crocuses, open-toed shoes (or just shoes of any kind that are not fleece-lined, waterproofed, and lug-soled) and the sight of green, green grass.  Since I can't have any of those, I'm indulging in retail therapy and food therapy both, and I don't feel the least bit guilty. If you feel like indulging along with me, click on the links in the captions to visit the sites where I found these lovely images.   

Isn't it time for some flowers and bunnies, and maybe a recipe involving eggs and lemons and fresh herbs?  

Tulip Magnolia Branches and Hungarian Storage Jars from Terrain


Little Hopper Taper Holder from Anthropologie

Bunny Cupcake Stand from Pottery Barn


Bluebird Eau de Parfum from Olivine Atelier

Okay, so the perfume is maybe more summer than spring, but as we hit record-breaking cold temperatures here in Maine this week, I think a little summer would be perfect about now, too.

Spaghetti Pangrattato with Crispy Eggs from Smitten Kitchen

I'm going to make this recipe tomorrow for dinner.  Tonight I'm making blood orange and fennel salad. The theme for me until the snow melts is sunshine in a bowl.

Sending love your way . . .

xo Gigi


Wednesday, February 18, 2015

Beautiful, Delicious, and Funny Things


Hello, my chickadees!  I'm not gonna lie.  This winter is turning out to be one for the books.  Any of you who live here in the Northeastern corner of the US know exactly what I'm talking about.  This photo is one I took of the banks of the Fore River on a day when the temperatures were below zero degrees Fahrenheit and we had fifty mph wind gusts.  I processed the shot after the fact to make it feel more like a painting than a photo, but the blustery snow was very real.  Today, Mr. Magpie is down at his job in Lowell, Massachusetts, a place which currently bears the dubious honor of being the snowiest city in America, with 111" so far this year.  Here in Portland we're expecting a few more inches tonight.  I think we could deal with the snowbanks over our heads if it weren't for the bitter cold.  


For kicks, you can compare this photo of our house with the one a couple of posts ago.  We've had more snow since this shot, but we've raked as much of it as possible off the roof and broken as many of the icicle-daggers as we could.  When I look back over my gardening calendar of the last two years, I realize that we had our first crocuses in the back yard by mid March both years.  I highly doubt that will be the case this year, a fact which, if I were a pessimist, would make me very bitter, indeed.  Instead, I've decided to look on the bright side.  All this snow means my perennials are under a thick blanket of warm insulation during all this cold weather, so even my roses and lavender should be fine when spring finally does arrive in July.  Just kidding.  June.  It will be here in June.

Our backyard during a storm


As usual when the weather is this intense and we're all feeling a little stir crazy, I've been seeking inspiration everywhere I can.  I thought I'd share with you a few recent glimmers of beauty, inspiration, and/or joy.  My brother Mark once posed the following questions to me about the things we encounter in life: "Is it beautiful?  Is it delicious?  Does it make me laugh?" he asked.  He then went on to say that  if it doesn't meet one or more of those three criteria, he didn't want or need it.  Mark is one of the smartest and funniest people I know, and I've used his three questions many times since to help myself decide about making purchases, selecting films to watch, books to read, or even to make bigger life choices.  Somehow, many choices do boil down to these categories for me, especially since I think beauty can be found in a well-told story, a smart turn of phrase, a kind gesture, or the accomplishment of even the smallest of goals. 

So, in true magpie fashion, I offer this list, in no particular order, of a few beautiful, delicious, and funny things:

~ This story told by Bill Murray about Gilda Radner.
~ This recipe for Dorie Greenspan's chocolate World Peace Cookies 
~ This bike trainer, which I truly believe is the only thing that is keeping Mr. Magpie and me at all fit or at all sane this winter--and sanity is a very beautiful thing, indeed . . . as are muscles.  :)
~ This baking show, which satisfies my love of baking, my Anglophile tendencies, and, since its a competition, is the closest thing to watching sports on TV that I will ever willingly do.  In fact, I don't have TV.  I watch this on my MacBook.  I also watch The Great Allotment Challenge on YouTube, for all of the above reasons except baking.  Just replace that with gardening, and there you have it. 
~This mystery show.  More Anglophile tendencies catered to quite happily.  Plus mysteries to solve--yes!  Plus there's Robson Green and James Norton to watch.  A beautiful addiction.
~This book by Nancy Marie Brown about a Viking woman who sailed off the edge of the known world five hundred years before Columbus.  Fascinating and well written. 


And finally, just thought I'd add the latest issue of Artful Blogging to the list.  I have a little bit of writing and a photo featured in the Blogging Buzz section this time around, but I'd say take a peek for all the other gorgeous inspiration inside.  

I hope you are faring well, my friends.  As always, you can find me on Instagram and Pinterest, as well as those other crazy social media platforms listed along the right side of the blog.  Just click on the icons to pop over for a visit.  I'm now on Twitter, too, so if you are as well, please be sure to connect with me.  I love staying in touch with you.    


Wednesday, December 3, 2014

Orange Upside-Down Cake

Please forgive the lousy picture quality!  We were in a hurry to eat, so I snapped a quickie iPhone shot, and then we tucked in.  Sometimes the stomach wins over art.
What does a magpie do when she has a bowl full of oranges plus a container of Greek yogurt in the fridge that needs to be used pronto . . . plus a serious craving for something sweet to go with a cup of Earl Grey?  She makes a sparkling, bejeweled orange upside-down cake.  I used this recipe from Family Spice.  It's incredibly fast and easy to prep, and it bakes in just 30 minutes in a cast-iron skillet.  My cast-iron skillet happens to be my favorite pan; it's well-seasoned and well-loved.  And now that this beauty of a cake popped right out of it with zero sticking, my cast-iron skillet is loved just a little bit more.

If you like oranges as well as a very moist cake, you will adore this recipe.  I'll definitely be making it again before Christmas, only this time I might do blood oranges and cranberries . . . or I'll change it up completely and do thin slices of pineapple (and maybe ripe mango).  I will likely add some vanilla as well, as the current recipe doesn't call for it, and I think it would boost the flavor a bit.  A little orange extract in addition to the orange zest would be nice, too, although just a drop or two.  It's easy to go overboard.  The recipe calls for plain Greek yogurt, but I only had vanilla, and it was delicious.  I often use vanilla yogurt when making sweet baked goods, and it substitutes beautifully.  I just use a little less sugar than the recipe calls for in order to balance out the sugar in the yogurt.

Thanks so much to subscribers and readers of The Magpie's Fancy!  I love getting your comments and emails, and I love visiting your blogs, too, so if you leave me a comment and you have a blog, please be sure to link back to it.  

If you don't already subscribe to The Magpie's Fancy, here are three ways you can receive updates:
  • Sign up to have new posts emailed to you.  Just enter your email address on my sidebar where it says "Subscribe to receive updates."  Most folks subscribe this way, as it's a quick and easy way to stay updated on what's new here. 
  • Follow The Magpie's Fancy on Bloglovin'.    
  • Follow me on Google+.  All posts from The Magpie's Fancy are now updated there, too.
Also, you can click here to follow my Instagram feed.  I post lots of photos and updates there that are not always on the blog.   This is an especially good option if you like my travel and restaurant posts, as I often do mini-travel posts on Instagram.

More soon, chickadees!  xo Gigi

Sunday, November 9, 2014

Thanksgiving Inspiration

The Beloved Peanuts Thanksgiving


I LOVE Thanksgiving.  Longtime readers of The Magpie's Fancy know that I'm not a fan of Black Friday . . . and that I am completely against the idea of going shopping on Thanksgiving Day itself.  I doubt that I have to explain why, but I will say that I am still an old-fashioned believer in devoting a day to giving thanks for all the blessings that we already have.  Period.  

I also think that the Christmas season has become so overblown and so darn long that it is about to completely obliterate Thanksgiving altogether.  This year, most of the stores in our area began putting their Christmas displays out before Halloween, and by now they are completely decked out in Yuletide finery.  I really love decorating for Christmas come December 1st or so.  Call me a Scrooge, but I need that month's separation between my candy corns and my candy canes.

Therefore, I'm slowing things down and taking one holiday at a time.  And I'm finding loads of Thanksgiving inspiration everywhere I turn, so I thought I'd share a few links that might inspire you, too, whether you celebrate American Thanksgiving or you just want to enjoy the beauty of autumn a little longer.

Photo Credit: Michael Graydon & Nicole Herriot from Bon Appetit
First, there's all that glorious food to consider.  And where better to turn for inspiration than Bon Appetit?  I picked up their Thanksgiving issue just before hopping on a plane in Pittsburgh this past week, and I found myself salivating as I turned the pages.  If the perfect mashed potatoes have always eluded you, check out their guide to making gorgeous and delicious potatoes.  Mr. Magpie makes them for us all year round, and he always uses Yukon Golds, as Bon Appetit recommends here in the guide.  Who knew he was such a brilliant cook?  I did, actually, because he makes my favorite potatoes in the world!

And this pie.  This is the one I'm dreaming of.  Luckily, Mr. M's birthday and Thanksgiving both fall in November, and Mr. M prefers pie to cake.  That means I have two excuses to make pie.  Maybe I'll also make this one . . . just for the sake of being thorough.  You know what they say: "a pie in the hand is worth two in the bush". . . or is it "a stitch in time saves pie?"  "You are the apple of my pie?"  "Pie.  It's what's for dinner."  That last one is what we say in this house.

I think this photo was originally from The Lexington Company.  If I'm wrong, please let me know!     
While it's far too cold in this part of the country to eat outdoors at Thanksgiving, I love the mood of the photo above.  Simple, elegant, and cozy.  A table to linger over long after the meal has ended.  Only inside.  With pie.

From Terrain

I'm also loving the colors and textures of the newest autumn offerings at Terrain.  Their catalog is always a wonderful mix of natural fibers and products inspired by forests and fields.  I have some of those Stargazer lights pictured here, by the way, and they are incredibly pretty!  No ugly cords, plus soft, warm light.  I have to admit, though, that I bought mine much cheaper.  Definitely shop around for the best price!  You can find ones that plug in or some that are battery powered, which would be perfect for table and mantle decorations.

Closer to home, I'm taken by the beautiful displays at some of my favorite local shops in Portland, Maine, especially this one and this one, run by wonderful friends with unerring eyes for beauty, function, and enduring style.  

And finally, this year, Thanksgiving comes after a particularly challenging election season.  Here in Maine, I was disheartened by the election results--and, perhaps more importantly, by the campaigns leading up to those results.  I was also disappointed to learn that on the national level, 2014 had the lowest voter turnout in any election since World War II.  Less than 40% of eligible voters went to the polls, and only 13% of voters ages 18-30 showed up to cast their ballots.  Like so many Americans, I am proud to live in a democracy, but a democracy is only as strong as its citizenry makes it, and I fear for the future of ours.  The Thanksgiving we celebrate here in the U.S. gives us an opportunity to reflect not only on our own blessings, but on what it means to us to be Americans, and on the legacy handed down to us by our forefathers and mothers.  Here is a brief exploration on poets.org of the history of Thanksgiving, as well as a few passages from poems about the holiday.  

If you celebrate Thanksgiving, how will you be celebrating this year?  Maybe with a little pie?  ;)  Do you have any recipe links or other Thanksgiving thoughts/inspiration you'd like to share?  Please feel free in the comments!

Wednesday, March 26, 2014

Peanut Butter & Nutella Cookies

I made this batch last week.  Thank you to Shutter Sisters for featuring this photo on their Instagram feed!

I simply have to share this recipe from The Sisters Cafe with you.  I'm not usually bossy here on the blog, but if you like Nutella, you simply have to make these cookies.  Period.  We are kind of Nutella fiends around here.  We dip pretzels in it, spread it on toast, smear it on strawberries . . . it's an equal opportunity spread in our house.

I haven't tried these cookies with gluten-free flour yet, but I will try them using my favorite, King Arthur gf flour.  Also, I made these using my own homemade peanut butter.  Can I be bossy one more time?  If you don't make your own peanut butter (or other nut butters), I highly recommend you try it.  I make mine with a mix of roasted salted and unsalted peanuts.  I just whirr them in the food processor for a few minutes until they are smooth and creamy.  It takes longer than you might think it will--maybe four minutes or so.  Let the nuts process past the "ball stage," during which the peanut butter balls up around the blade and looks quite grainy.  It hasn't yet released all its oils at this point.  It will be a little bit soupy by the time it's actually finished.  It will also be warm and will smell divine. Pour it into a clean container, where it will firm up a bit, but will never be as firm as store-bought brands, unless you refrigerate it.  I keep mine in a plastic tub in the cupboard, and I just give it a quick stir before using.  I can't imagine life without it!  And I believe it makes these cookies taste even more fantastic.

Thank you to the wonderful women at The Sisters Cafe for a keeper recipe.  I found it on Pinterest, which I believe further justifies my pinning addiction :).

Tuesday, March 11, 2014

Blossoms and Butter Biscuits

I have a heart full of thanks for friends and readers who shared their thoughts on my last post.  Your emails, Facebook messages, and comments on the blog gave me loads to think about, and also cheered me up a bit about the fate of blogging--as well as the fate of reading in general.  We all seem to be sensing the change in the wind, but many of us still seek real writing and real depth, whether it's online or in the pages of books.  While I worry about the longterm fate of reading, for the moment, I know I am part of a community of passionate thinkers, readers, writers, and makers.  

I will be moving over to the new blog sometime soon, but in the meantime, I'll keep posting here.  My biggest challenge at the moment is simply getting out of my own way.  I have so many irons in the fire, so much work that I'm doing, and so many roadblocks to navigate as I move forward that some days I wonder how I'll ever make it all happen.  Some days it would be easier to go back to my old life.  Some days I want to give up.  Winter doesn't help.  I know it's March, which means spring is around the corner, but here in Maine we have more snow coming tomorrow, and more predicted for next week.  I truly think that if I could just dig in the dirt again, the part of my spirit that is broken would begin to mend.  Soil and sunshine and the smell of grass would fix it.  Since they are still weeks away, I've been filling the rooms with pockets of blooms--campanulas and grape hyacinths and forsythias for forcing.  

And when flowers alone are not enough, there's always chocolate.  If your spirit is feeling as beaten as mine is, I recommend this chocolate pudding recipe.  I've made it twice in the past three weeks, and both times have resulted in empty bowls and the kind of deep, satisfied sighs that only dark chocolate can cause. 

If chocolate pudding still falls short of curing what ails you, then bless your little heart, I made some maple syrup butter cookies the other night that I can honestly say did the trick for me . . . at least for an hour or two.  Now that it's nearly maple syrup season here in New England (Maine Maple Sunday is March 23), these will be the perfect spring cookies to make for dipping in your Earl Grey.

The Magpie's Maple Syrup Butter Biscuits

1/2 cup butter
1/2 tsp vanilla
1/3 cup maple syrup
3/4 cup unbleached white flour
1/4 cup almond meal/flour (I used Bob's Red Mill brand)

~Preheat oven to 350 degrees.
~Cream butter, vanilla, and maple syrup together.
~Add flours and beat until blended.
~Pipe or spoon onto a parchment-lined baking sheet to make 1" round cookies.
~Bake 12-15 minutes until lightly browned around the edges.
~Cool on a rack, then dust with powdered sugar. 

Notice I don't have a single picture of these little wonders.  You will have to make them yourself and take beautiful shots of them on a rustic farmhouse table with powdered sugar sprinkled artfully around.  Please be sure to cross-process the images, giving them just the right amount of faded, nostalgic, old-timey charm.  You know that's what I'd have done had I not been too busy baking--and then eating--these bundles of floury, buttery joy.  Do make sure to include the almond meal.  I think that is the key to their beauty.  It makes them slightly chewy, yet light and crumbly, too.  Wouldn't it be lovely if everything in life were so satisfying?   

Thursday, October 3, 2013

Autumn Artichokes and Pistachios


I promise I have one more post about the England trip, but I couldn't let another day pass without sharing a quick and easy baked stuffed artichoke dish I made the other night.  I know artichokes can seem daunting, and they do take a little work, but they are so worth the effort.  And when I saw these beauties at the store, I needed to scoop them up.  They were incredibly fresh and the size of large grapefruits (or small melons!)--perfect for stuffing.


Lemon and Pistachio Stuffed Artichokes

~Makes two very large servings (I ate half of mine and finished the rest for lunch the next day)
~All measurements are approximate.  I eyeball everything when I cook!  This recipe is very forgiving, and you can easily make substitutions as you go.

  • two extra-large artichokes
  • 2/3 cup pistachios, shelled and roughly chopped
  • approximately 1 cup crushed crackers or bread crumbs (I used lavash every seed crackers)
  • 1/3 cup freshly grated parmigiano reggiano (plus extra for sprinkling on top)
  • zest and juice of one lemon
  • 2 mince garlic cloves
  • large handful chopped fresh parsley
  • salt and pepper, to taste
  • olive oil (I use it as needed to moisten the filling and then to drizzle on top after the artichokes come out of the oven)

Preheat oven to 425 degrees F.

To prepare the artichokes, cut off the stems with a serrated knife, making the bottoms flat so they will sit upright in the baking dish.  Then cut off the top 1/3 of the each artichoke.  You'll still have some tough outside leaves.  Pull these off.  Take a sharp serrated knife and trim the outside of each artichoke until you have no tough, fibrous parts left.  If you are new to cooking artichokes, there are loads of online photo tutorials for trimming them.  In fact, you can visit Saveur for a good one.

Once I've removed all the tough outside leaves, I take a knife or pointed grapefruit spoon and scoop out the hairy choke inside.  When you spread the leaves apart a little, you'll see it at the center.  Scoop it out, making sure you remove all the fibrous hairs.  They don't feel good in one's mouth!

Now rub the whole denuded and rather sad-looking artichoke (I promise it will become beautiful again) with a half a lemon.  The lemon juice helps to keep it from discoloring.


Okay, all the hard stuff is out of the way.  I promise.  From now on it's easy peasy lemon squeezy.  Toss all the stuffing ingredients together in a bowl, adding the olive oil last, just to moisten the whole lot.  It will look, smell, and taste gorgeous.

Hold an artichoke in one hand and scoop stuffing into it.  I use my clean bare hands, making sure I get stuffing in between the layers of leaves--every crevice--leaving no lovely ruffly space unfilled.  When you're finished, you'll have these rather sexy rosettes overflowing with goodness.

Place them in a flat-bottomed casserole dish, pour in about an inch of boiling water around them, being careful not to pour the water over the stuffing (this will give them a steam bath in the oven).  

Rub some olive oil on one side of a large piece of foil.  Cover the dish completely with the olive oil facing in towards the artichokes.  Now tie a piece of cooking twine around the edge of the dish to hold the foil tightly in place during cooking.

Bake for about 45 minutes.


When the artichokes come out they will be tender and luscious.  I like to take off the foil cover and pop them under the broiler for a couple of minutes to crisp up the tops.  Then I sprinkle a little more cheese and a small glug of olive oil.

I placed our artichokes at the center of a bowl of pasta that I'd tossed with some simple aglio olio I'd made while the artichokes were cooking (heat oil in a pan, toss in minced garlic, red pepper flakes, fresh parsley, salt and pepper, then cook for about five minutes--that's it).

The stuffing tumbled out into the pasta as we ate, using a combination of fingers and forks and knives to work our way through the layers of the artichoke, making the entire meal a treasure hunt.  And the combination of lemon, pistachio, and cheese in the stuffing creates a very special flavor--a little sweet, very nutty, but balanced by the acidity of the citrus and the salt of the cheese.  I think you will love it, too.


I truly think this is the best time of year for cooking and sharing meals.  Happy October, my friends!  

Tuesday, June 11, 2013

Chive, Basil & Radish Butter


Just a quick post to share with you one of our favorite spring and summer toppings/spreads/oils/schmears/indulgences: chive butter.  I've extolled the virtues of sweet and spicy radish butter before.  I'll probably do it again.  

What I love most about it is that you can vary it endlessly.  This summer it's all about adding minced chives from the garden, along with whatever herbs are looking great in the garden at a given moment.  Today I ran out into the rain and snipped off a big leafy bunch of purple basil, so we got the one-two-three combo of chives, basil & radishes.  It doesn't take much to transform butter, which is pretty perfect on its own, into something transcendent.  

For this combo, I soften a stick of butter, then mince a handful of fresh chives, a few leaves of basil, and one or two radishes.  I then stir it all together, along with a sprinkling of sea salt, since my butter is unsalted.  You can add pepper, too, although the radishes from our garden are pretty peppery, so I didn't.

Then you've got a spread for sandwiches (I like it for cucumber sandwiches; Mr. Magpie likes it on turkey or roast beef) or crackers.  It's also gorgeous tossed with steamed veggies or rice, or added at the end of a saute for pasta.  In fact, you can toss just this in with some cooked pasta and some grated parmesan--heaven!  It's great for making omelets, too!  We keep a bowl of it in the fridge so we can use it whenever we want.

I so hope you'll enjoy this, my friends!  

Wednesday, April 3, 2013

If This Isn't Nice, I Don't Know What Is

Hello, lovelies!  Spring has finally arrived here.  Yes, it's freezing cold at night still, but days are sunshiny, tulips are finding their way up into the world, and the forsythia are about to burst open.  All this loveliness calls for bright and cheerful recipes to welcome in the change of seasons.

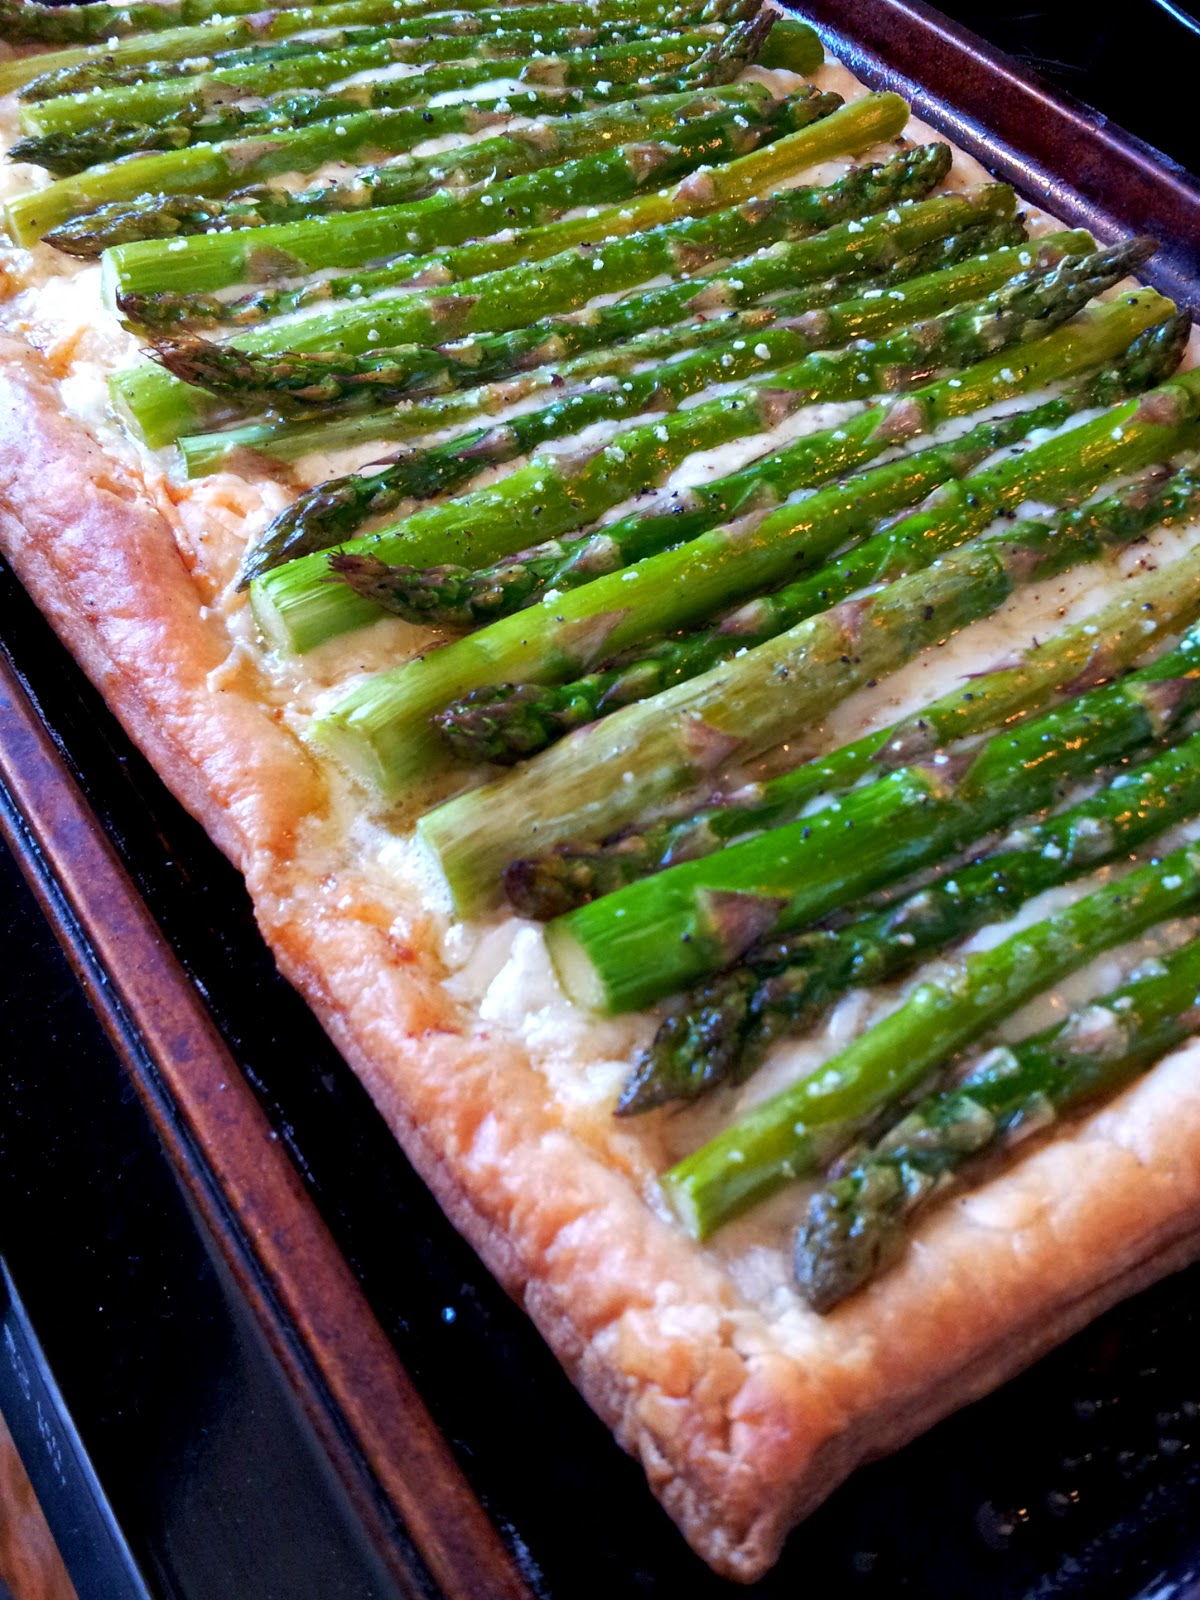
And so, I share with you two recipes I made for Easter.  The first is a Donna Hay recipe for a lemon ricotta cheesecake that you can find here. It's extremely creamy with a shortbread crust.  Yes, it is even more delicious than it looks.


The second recipe comes from Martha Stewart.  It is fast, easy, looks like a million bucks, and tastes incredible.  Seriously.  I will make this one again and again.  You can find it here.  This was a big hit at Easter.  This version uses gruyere cheese and asparagus, but I could imagine making this with other veggie and cheese combinations: asiago and long ribbons of zucchini come to mind immediately.

I have so much I want to share with you.  I've got loads going on with my writing, have been gardening every spare minute, and am excited that it's National Poetry Month.  I'm also doing a tremendous amount of editing, tutoring, and book coaching for clients, so I can't blog as much as I'd like at the moment, but I'm going to try to carve out as much time as possible to share all my favorite aspects of this beautiful time of year.  I'm itching to grab my camera and get back to doing some real photography again as well.  

Right now, I have so many risky things going on in my creative life that I feel constantly on the brink--and not always in a good way.  I need balance, thus I remind myself often of this quote from Kurt Vonnegut: "I urge you to please notice when you are happy, and exclaim or murmur or think at some point, 'If this isn't nice, I don't know what is.'"

I hope you are thriving and creating and loving your days.  xo Gigi

P.S. The raspberry coconut ice cream from the last post was delicious! A little icy since it's not made in an ice cream maker, but very yummy.


Tuesday, March 26, 2013

Here Comes the Sun


Breakfast at the ocean this morning.  We picked up bagels from our favorite shop and ate them in the cold, looking out over the waves. 

Back home in the yard under the great white pine, the crocuses are opening:


I find myself humming "Here Comes the Sun" at odd moments while I work on projects for clients today.  Spring must be here at last.

Tonight I'll be making spicy fried tofu, along with this delicious sriracha fried rice and some steamed greens with sesame oil and garlic.  


For dessert, I'm making homemade raspberry "ice cream."  In a blender, I pureed about 6 ounces frozen raspberries, 1 can coconut milk, and a couple tablespoons or so of raw honey.  The pink loveliness that resulted was divine. I poured it through a strainer to remove the seeds, then I popped it into the freezer.  So far, it seems to be freezing beautifully.  Tomorrow I'll let you know how it was!

I hope you are having a beautiful week, my friends!

Monday, December 24, 2012

Homemade Needhams: A Maine Christmas Treat

Okay, my lovelies, this is going to be quick because, like many of you, I am rushing this morning to finish a million and one last-minute tasks, but I really, really wanted to get that Needham recipe out to you.

We made a double batch, but I'll give you the single recipe.  Just know that it doubles beautifully, if you want to make loads of them for, say, your New Years party.  Needhams are a Maine tradition at Christmas, and there are lots of recipes for them out there, most of them including paraffin wax to help the chocolate harden and give it a bit of sheen.  I don't like putting wax in chocolate, so my recipe has a bit of shortening instead.  They set beautifully, and I usually store them in the fridge in plastic.  I love them either cold or at room temperature.

You see that little bump on the top of each one?  That's a roasted, salted almond.  Traditional Needhams don't have them, but I love to gild the lily.  If you love Almond Joys, make these, and you will never settle for a store bought one again!

The Maine Magpie's Needhams 
  • 1 1-pound box of confectioner's sugar
  • 1/2 cup plain smooth mashed potato (I use a russet.  I peel the potato, boil it, then throw it in the food processor and whip it until it's basically a smooth paste.  This is how you'll want it for the recipe.)
  • 2 tablespoons unsalted butter
  • 2 teaspoons vanilla extract
  • 1/4 teaspoon salt
  • 14-ounce bag shredded, sweetened coconut
  • 1- 1 1/2 pounds bittersweet chocolate, chopped or broken into pieces (I use a little over over a pound.)
  • 2 tablespoons vegetable shortening
  • About 30-40 almonds (depending on how big you make your squares)
Pour the confectioner's sugar into a large heatproof bowl.  Make a well in the middle, then add the potato, butter, vanilla, and salt.

Place bowl over a pot of barely simmering water.  Stir from the center of the well, gradually incorporating the sugar.  After a few minutes, you'll end up with a thick, smooth paste.  

Remove from the heat and stir in the coconut.  Taste.  Yum.

At this point some folks spread the mixture on a jellyroll pan and freeze it.  Once chilled for about 20 minutes, they cut it into 1" squares to dip in the chocolate.  Others freeze it right in the bowl and then form each square individually by hand.  The choice is yours.  I molded each one by hand because I wanted them to have a very homemade look.  If you do it this way, it's important to freeze them one more time after shaping them and before dipping them.

Melt the chocolate in a microwave safe bowl.  I do 30-second intervals, stirring between each one.  Be careful not to scorch the precious chocolate!

Once the chocolate is smooth and melty, stir in the shortening.  Be sure to incorporate it completely.

Now you're ready to dip!  I use a fork to dip each square in the chocolate, but first I press a roasted, salted almond into the top of each square.  I can't stress enough how much this extra little touch adds to the Needhams. 

Let the candies cool and harden at room temperature on parchment covered cookie sheets for at least an hour.


I so hope you'll  enjoy these traditional Maine treats, my friends.  Sending you and yours all best wishes for a very Merry Christmas.  May you spend it just the way you wish, and may you discover moments of peace amidst the rush of the season.  

xo Gigi

Thursday, November 1, 2012

Falling Leaves and Pumpkin Seeds


Happy November, my friends!  My three-month-old MacBook hard drive crashed last week, and it's still not back from the Mac Store yet.  I miss it, but in the meantime, Mr. Magpie is lending me his laptop.  I know I've been promising photos of the house, and they are coming, but delayed furniture deliveries and other hold ups are slowing down progress on the house.  We're loving being here all the same, so it doesn't really matter to us!  For the moment I thought I'd just share a moody late afternoon instagram shot of one of my kitchen windows. 

October was wonderful here in our new neighborhood.  One highlight was a visit from our niece, with whom we built an entire fairy village, complete with street signs, a hospital, school, a senior center--yes, she's that thoughtful a girl--a restaurant, farm, lookout tower, and much more.  I have tons of photos that I'll share once my computer is up and running, but in the meantime, here's one of the fairy houses.  This one's long gone now, as it was one of the first to be eaten by the giants squirrels who invaded the village.


Our lovely dead end street just an hour before Hurricane Sandy hit.  We have wonderful woods for exploring and for gathering fairy village supplies at the end of the street.


The morning after Sandy hit the waves at Portland Head Light were monstrous--beautiful, but monstrous.  We were fortunate to lose just a few tree limbs during the storm.  Our hearts go out to all those who lost loved ones or whose homes and businesses were damaged or destroyed. 

As the winds raged around our little house, we nursed a sick kitty (who is now on the mend, thanks to antibiotics) and made Halloween cards. 

And the first Halloween in the house was a good one.  We bought far too much candy, as we had no idea how many ghouls and superheroes would show up, and we didn't want to run out.  So leftover m&m's it is for dessert from now until . . . well a long time from now.  Sigh.  I like m&m's too much for my own good.

Last but not least, I roasted pumpkin seeds this morning from the seeds leftover after carving jack-o-lanterns last night.  The recipe follows below.  More just as soon as my MacBook's up and running.  Thanks for bearing with me, lovelies!


Quick Roasted Pumpkin Seeds
  • approximately 2 cups washed and dried pumpkin seeds
  • about 5 dashes worchestershire sauce
  • a dash or two (or more) of your favorite hot sauce
  • 1 tablespoon chopped fresh rosemary
  • about 1 teaspoon cajun spices
  • salt to taste
  • about 1 tablespoon demarara sugar
  • about one tablespoon olive oil.
Toss all ingredients together in a bowl.  Let sit.  Preheat oven to 375 degrees.  Once the oven is heated, pour the coated seeds onto a parchment-lined baking sheet and roast for about 10 minutes.  Take them out, stir well, then put back into the oven for another 5 minutes. Stir and repeat.  I ended up roasting mine for a total of about 25 minutes, but it will vary depending on how wet your seeds are to begin with.  Just keep checking on them and stirring them every five minutes and you won't burn them.  Let cool, then munch away!

A warm welcome to new readers and a big hug to old friends.  xo Gigi

Tuesday, October 9, 2012

Pecan Pie


I promise photos of the house very soon, but in the meantime, I have to share a recipe with you.  Over the weekend I made a pecan pie for a very special family event, and I thought, what better dessert to celebrate autumn than pecan pie?

I've made it before, but I decided to try a new recipe this time, and I'm glad I did.  Actually, I combined a couple of different recipes from Martha Stewart and Nick Malgieri, added a few variations of my own, and came up with what turned out to be my favorite pecan pie ever.  Less dense and gooey than many, this one has almost a custardy texture, and while no pecan pie feels light when you eat it, this is as close to creamy as a pecan pie can get.  It's all due to the eggs--lots of 'em.  Plus, I use very, very little light corn syrup compared to most pecan pies, which often get their sweetness from loads of dark corn syrup.  The sweetness in this version comes instead from molasses and brown sugar, making the flavor deeper and more complex--more autumnal.  Molasses is a traditional sweetener in New England desserts like Indian pudding, so if you like that kind of fall treat, you will love this pie!  It is not health food, that's for sure, but a little sliver is all you need (okay maybe two slivers), topped with a dollop of whipped cream or a scoop of vanilla ice cream--or even plain.

The Magpie's Pecan Pie

For the crust (adapted from Nick Malgieri's sweet dough recipe):

Note: I make a double crust recipe, using one half to make the crust and the other half to roll out and make little leaves for the top of the pie.  The recipe here is for one crust. If you'd like to decorate your pie with leaves or other cutouts, simply double it.

1 cup all-purpose flour
2 Tablespoons sugar
1/4 teaspoon baking powder
1/8 teaspoon salt
4 Tablespoons cold unsalted butter
1 large egg

I make this in a food processor, but you can make it by hand, too.

  • Combine the dry ingredients in the work bowl of a food processor fitted with a metal blade.
  • Pulse 3 times at 1-second intervals.
  • Cut the butter into 1-T pieces and toss in work bowl.
  • Pulse about fifteen times until the mixture resembles corn meal.  
  • Add the egg to the work bowl and pulse until the dough forms a ball.  This only takes 10-15 seconds.
  • Scatter a little flour on your clean work surface.
  • Turn the dough out of the bowl and knead it 3 or 4 times quickly until it all holds together.  Do not overwork!
  • Press dough into a disk and sandwich it between two pieces of plastic wrap.  Press into a 6-inch circle, seal it with the wrap and refrigerate for at least an hour.

Ingredients for the filling (adapted from Martha Stewart's Baking Handbook):
5 large eggs
1 1/4 cups packed light-brown sugar
6 Tablespoons unsalted butter, melted
1/3 cup light corn syrup
1/3 cup unsulphured molasses
1 Tablespoon bourbon, dark rum, or rum flavoring
1 teaspoon vanilla
1/4 teaspoon salt
1 2/3 cups pecans, coarsely chopped, plus 1/3 cup whole pecan halves

To make the pie:
  • Set a rack at the lowest level of the oven and preheat to 350 degrees.
  • Roll out the chilled crust and set in a 9-inch pie pan.  I use a Pyrex pan for this recipe.
  • Crimp the edges of the crust in your favorite decorative pattern.
  • Place the crust in the fridge until you're ready for it.
  • If you want to make decorative leaves for the top, roll out your second crust, cut the leaves with small leaf-shaped cookie cutters, and then place the leaves on a cookie sheet covered with parchment paper.  Whisk one egg with a splash of milk or cream and brush this mixture over the leaves with a pastry brush.  Refrigerate the leaves until you're ready to use them.
  • In a medium bowl, make your filling by whisking together the eggs, brown sugar, corn syrup, molasses, bourbon or rum, vanilla, and salt.  Stir in the chopped pecans.
  • Take your prepared crust out of the fridge and pour the filling into it. 
  • Arrange pecan halves and decorative leaves (if you're using them) on the top of the filling.
  • Brush a little egg whisked with milk or cream over the crust edges for a gorgeous golden color.
  • Bake the pie for about 45 minutes, until the filling is well-set and puffed in the center.  I have a gas stove, so I find that I have to check the pie every 10-15 minutes, and turn it for even browning.  If the crust seems to be browning too quickly, you can always cover just the crust edges with some aluminum foil or, if you have one, a crust ring.
  • Cool on a pie rack.
  • This pie keeps fine at room temperature, loosely covered with foil, for about 3 days.

One more note: You'll have some crust leftover from making the leaves.  I re-roll this with my rolling pin into a rectangle, spread a little softened butter on it, and sprinkle it with cinnamon and demerara sugar.  Then I roll it up, jell-roll style.  I cut the roll into 1-inch pieces, brush each with egg, sprinkle a little more sugar on top, and pop them into the oven on a parchment-lined baking sheet for about 20 minutes.  They're great straight out of the oven or for breakfast the next day.